
How To Make Layered Cards – a Guide to Cardmaking Anatomy
Posted: 31/07/2025 Cardmaking Tips, Getting Started
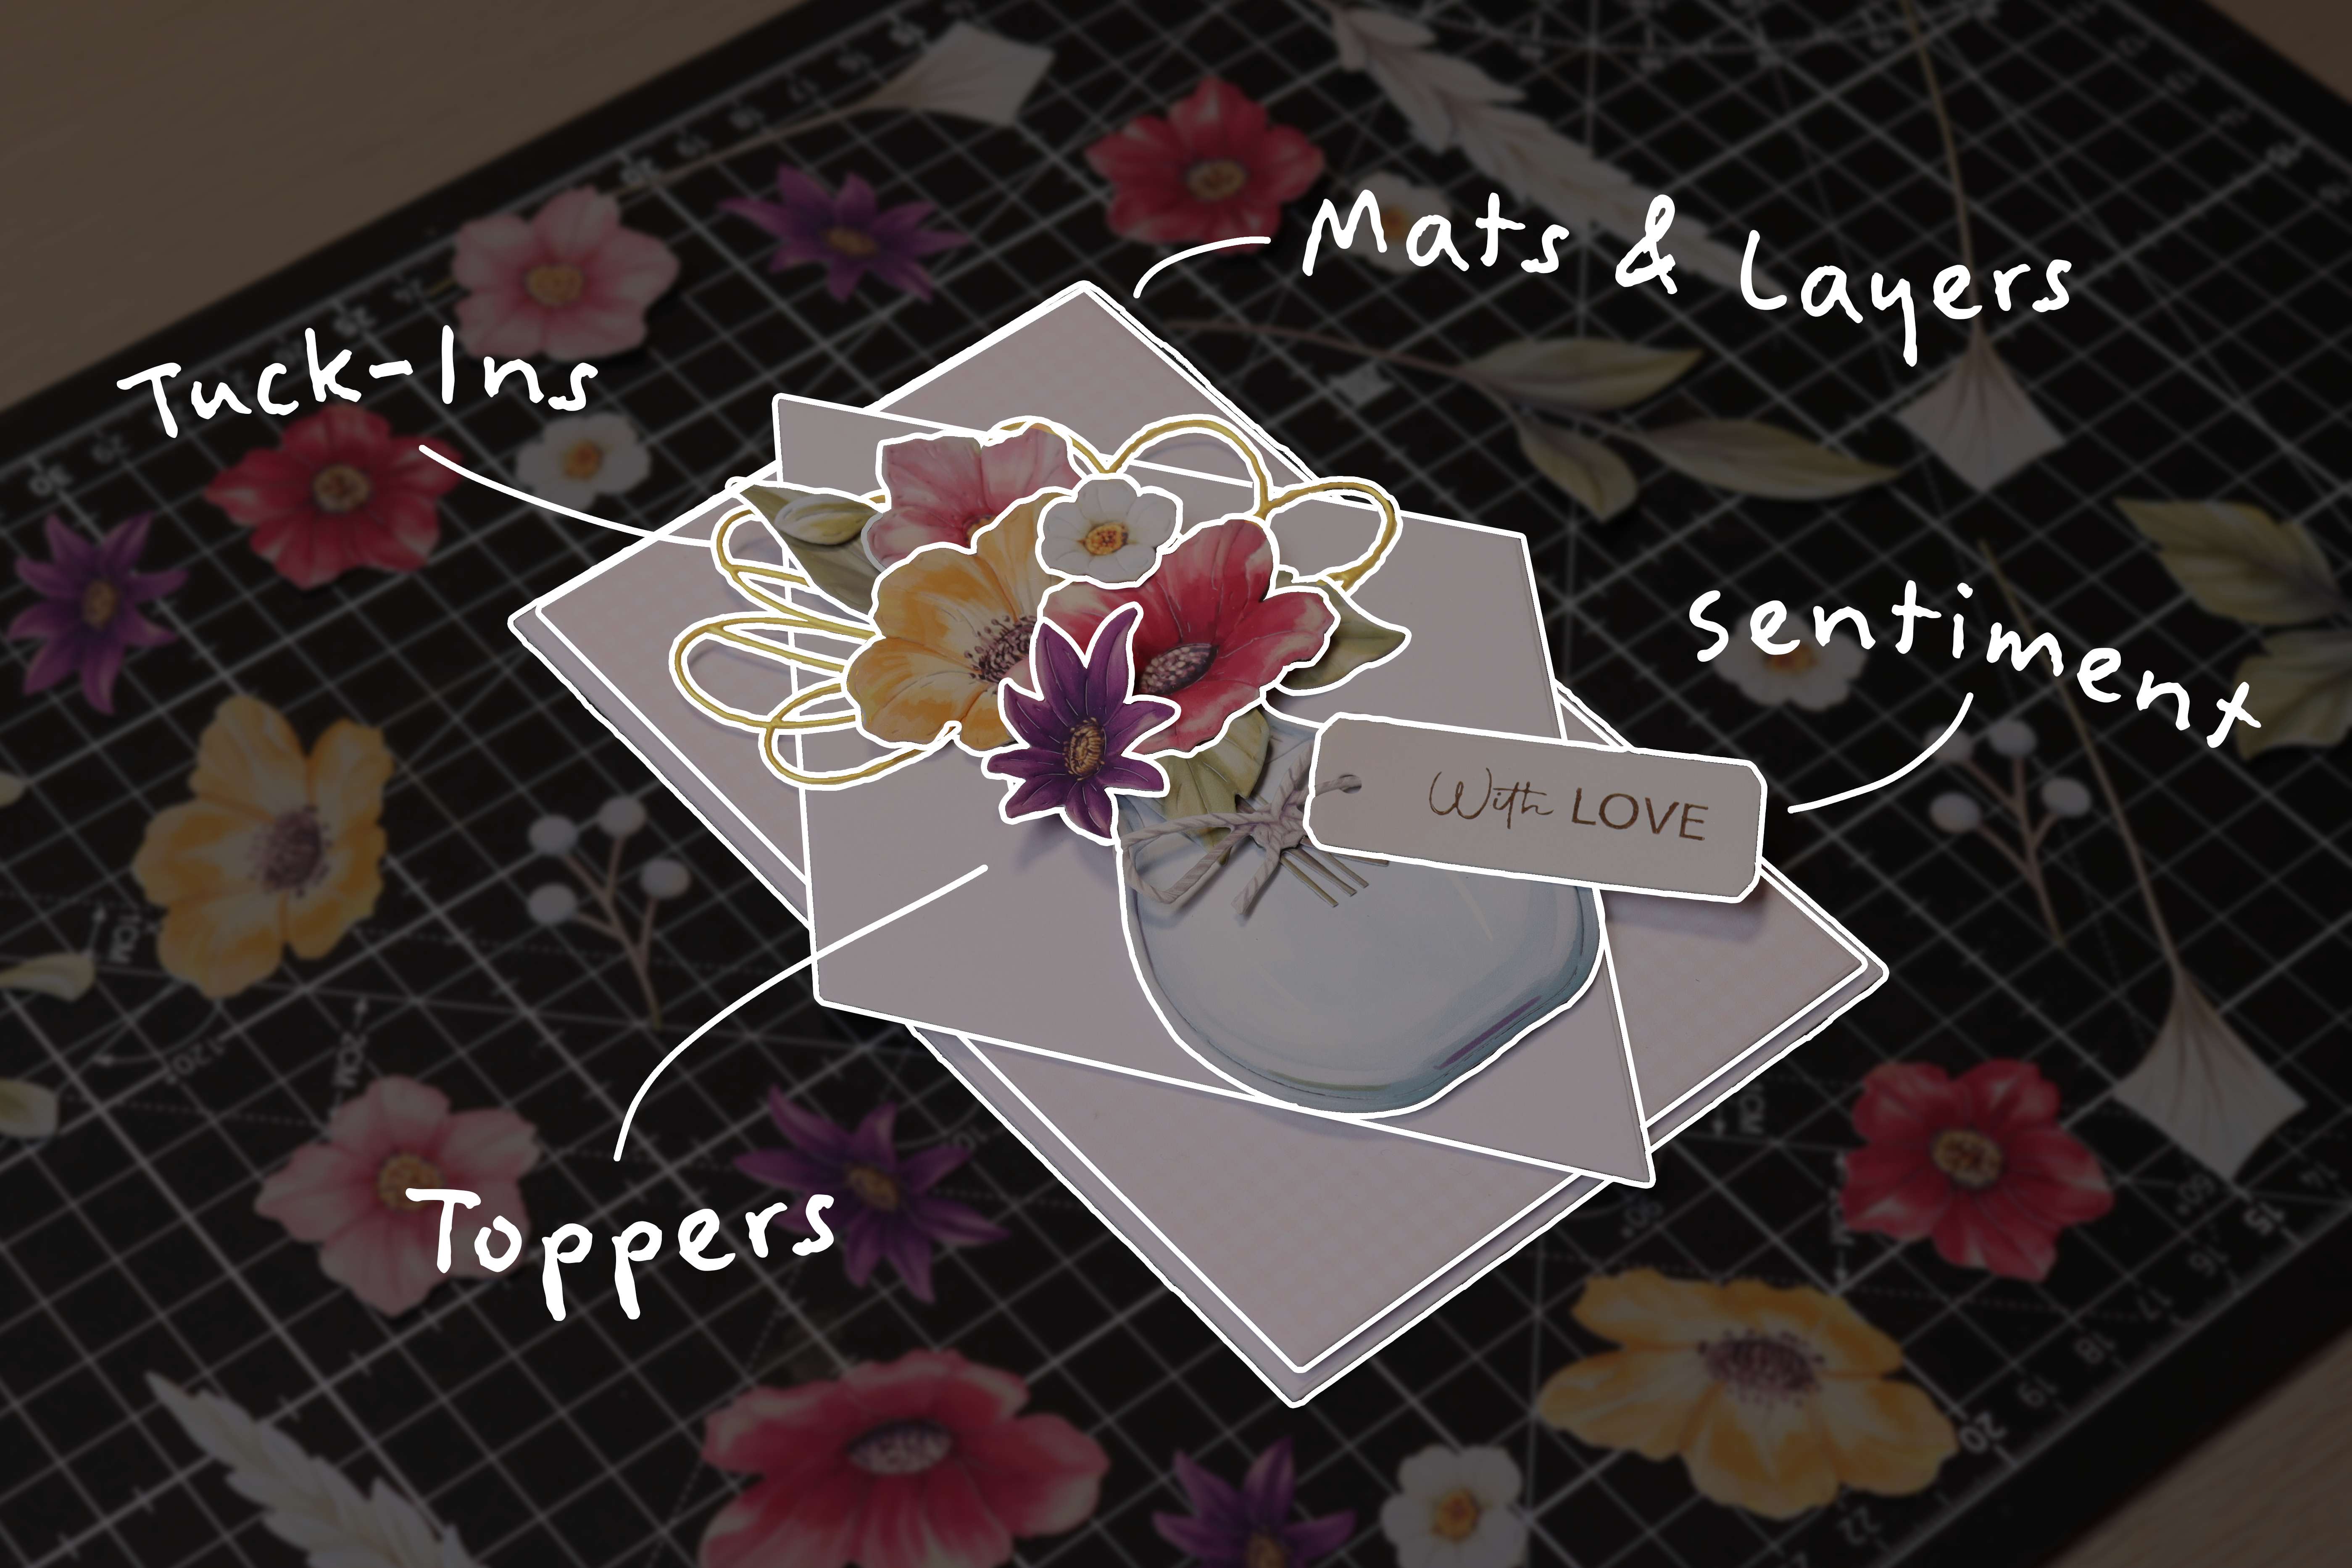
Whether you’re brand-new to cardmaking or you’ve been crafting cards for a while, creating beautiful cards can feel like a puzzle. This is especially true when deciding what elements to include and where to put them. We’re here to demystify all the parts that go into your typical card make to help you learn how to make layered cards with beautiful toppers, mats, layers, and more!
Mats & Layers
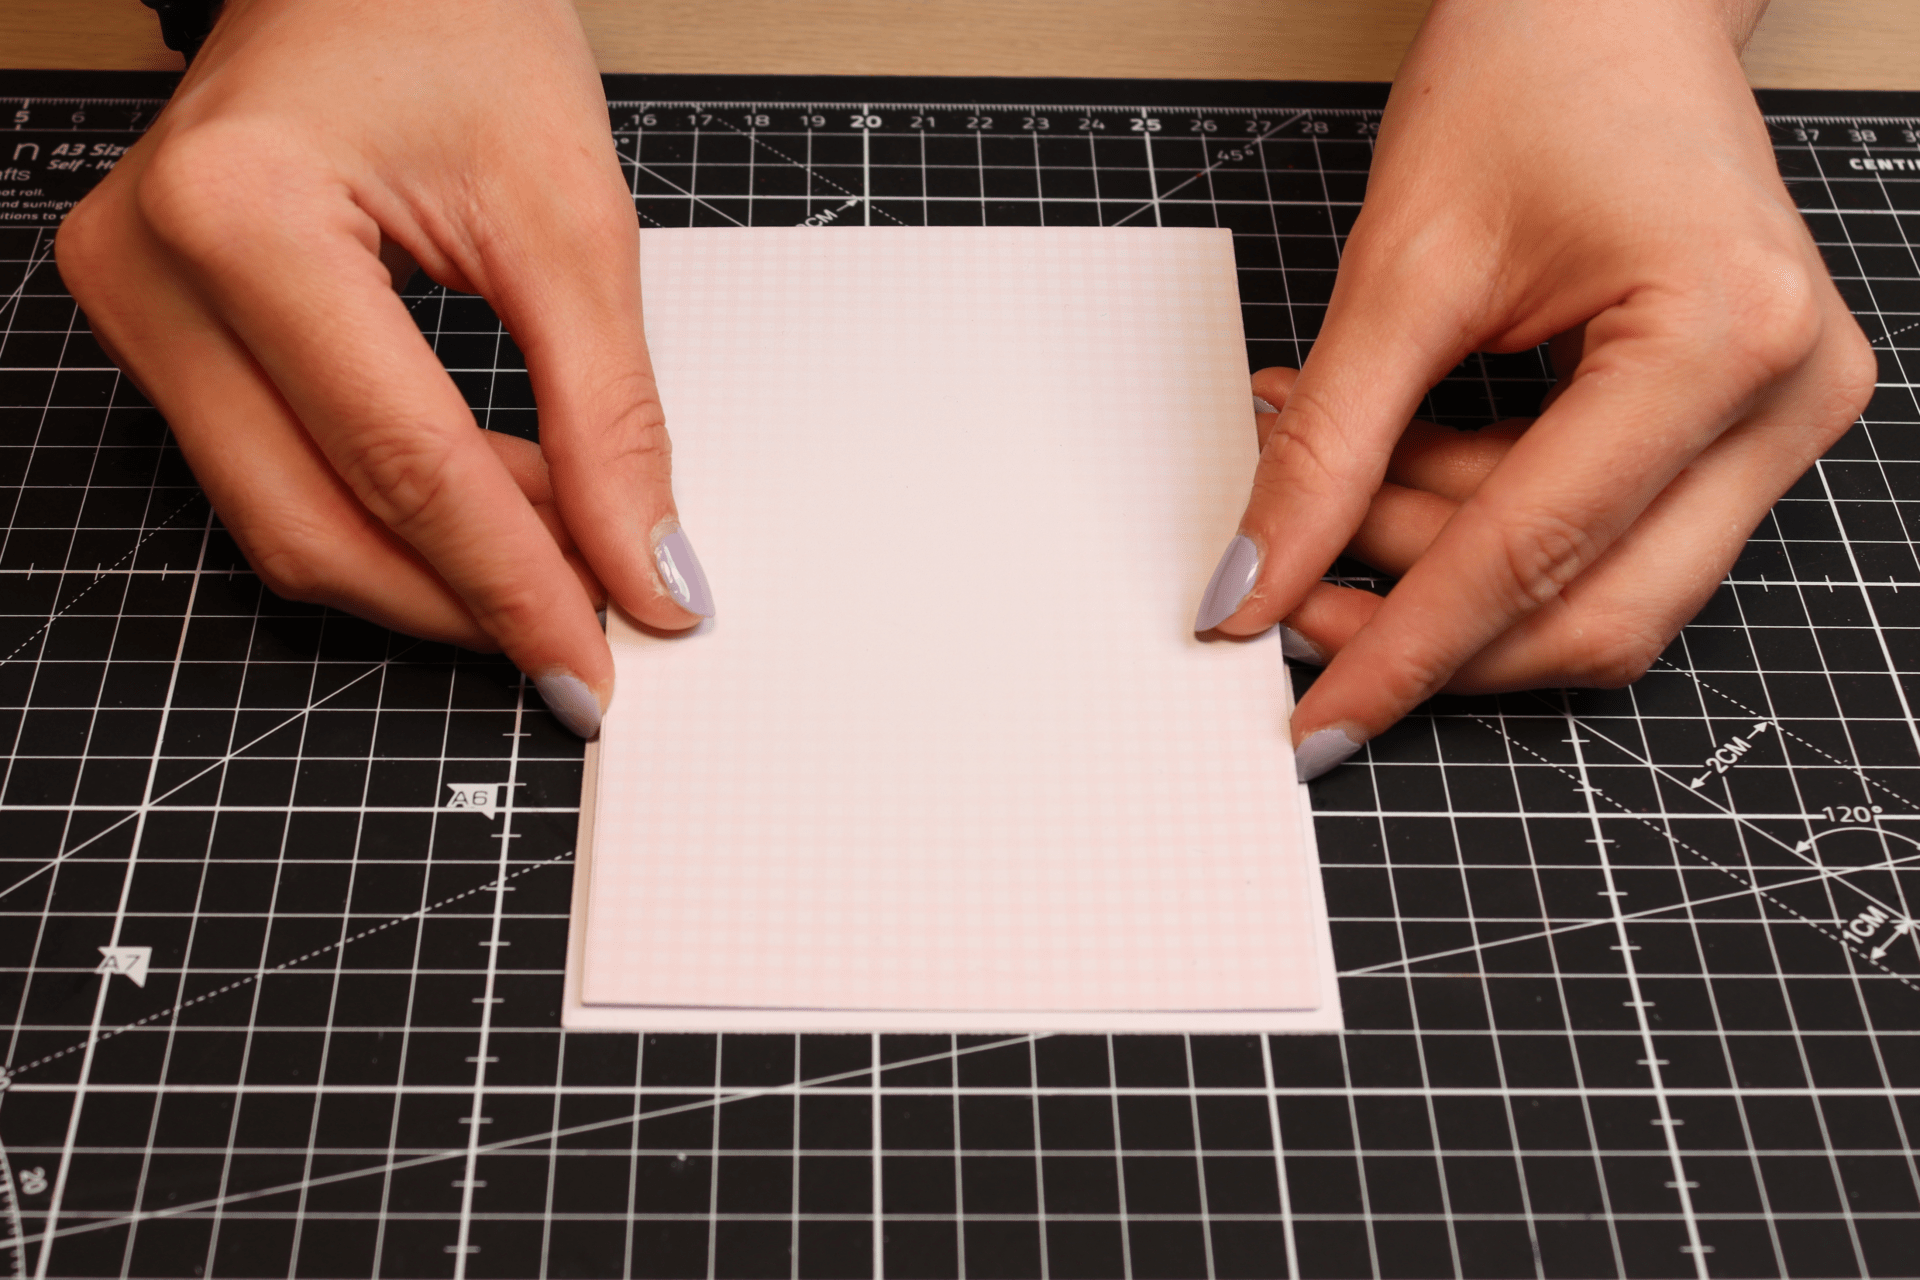
When it comes to how to make layered cards, you’ll always start in the same place: with mats and layers.
Mats and layers are like the bricks and mortar of your card – they are the base which will hold all of your other elements. Card bases can be a multitude of shapes and sizes, and can be built and folded in a variety of ways as well. Once you’ve decided what shape you’d like your card to be, the next step is to add some mats and layers!
Mats and layers are usually added using progressively smaller sizes of your largest base die, which will help to frame your design and draw the eye in. Alternatively you could mix-and-match different shapes to create a unique silhouette, like we’ve done with our card below. You can choose to stick these layers down flat or use a foam tape to add some height and dimension to your card. Another detail to keep in mind is the colour of your mats and layers. You may choose to do white-on-white layers for a clean look, or you might want to try adding a coloured layer to tie into your topper elements, or even a gold or silver layer for a touch of luxury!

Read our article about creating perfect white-on-white card bases here
Toppers
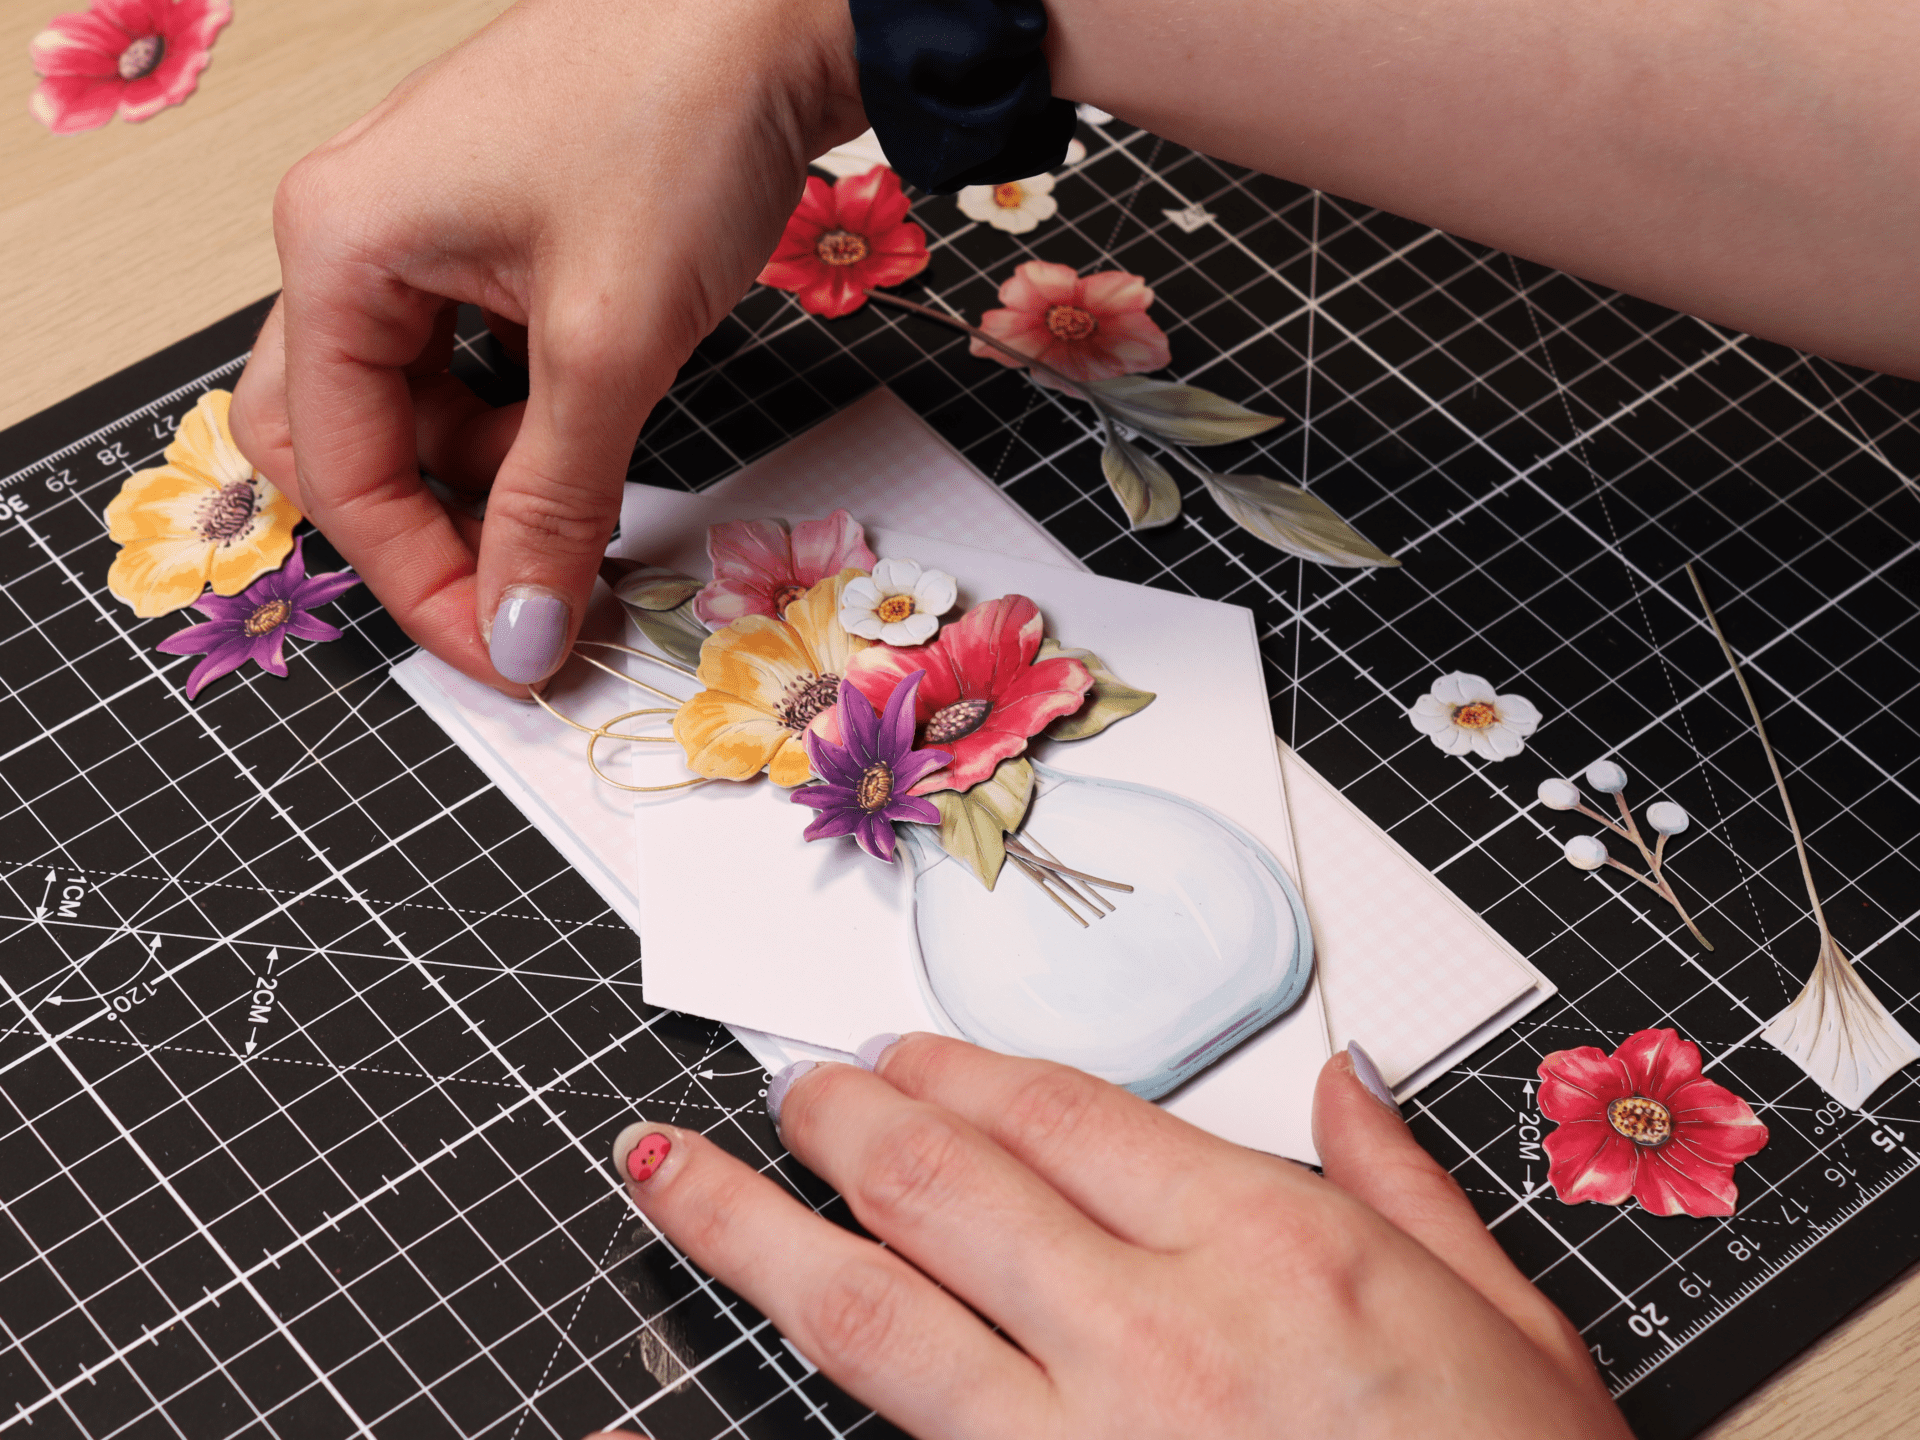
Toppers are the main content of your card, the elements that will make them stand out from the rest. They are usually the first thing that is decided on when approaching how to make layered cards. They may be florals, characters, or anything you can imagine! The toppers you choose will determine the ‘look’ and theme of your card. You can choose to tailor your card to suit your recipient’s hobbies or tastes, or pare it back with a simple flower that will suit anyone’s taste – the choice is yours!


Take a look through our selection of dies to find the perfect topper for you card
Tuck-Ins and Embellishments
After you’ve built our card base and added your toppers, you might want to add an extra decorative element to give your card a special look.
Tuck-ins are die cuts often in a delicate filigree or lace design, which work alongside your topper elements. They add a layer of visual interest to your card, as well as breaking up large areas of negative space. These elements are called tuck-ins as you would ‘tuck’ them behind or between your toppers. They are normally designed to be cut out of white cardstock, but why not get creative and try cutting them out of gold or coloured cardstock instead?
As well as tuck-ins, there are numerous other kinds of embellishments that are used to give card makes that decorative edge. These may be in the form of die-cut elements like filigree and lace panels, or other embellishments like ribbon, gemstones, tiny lights and gold foil.
Sentiments
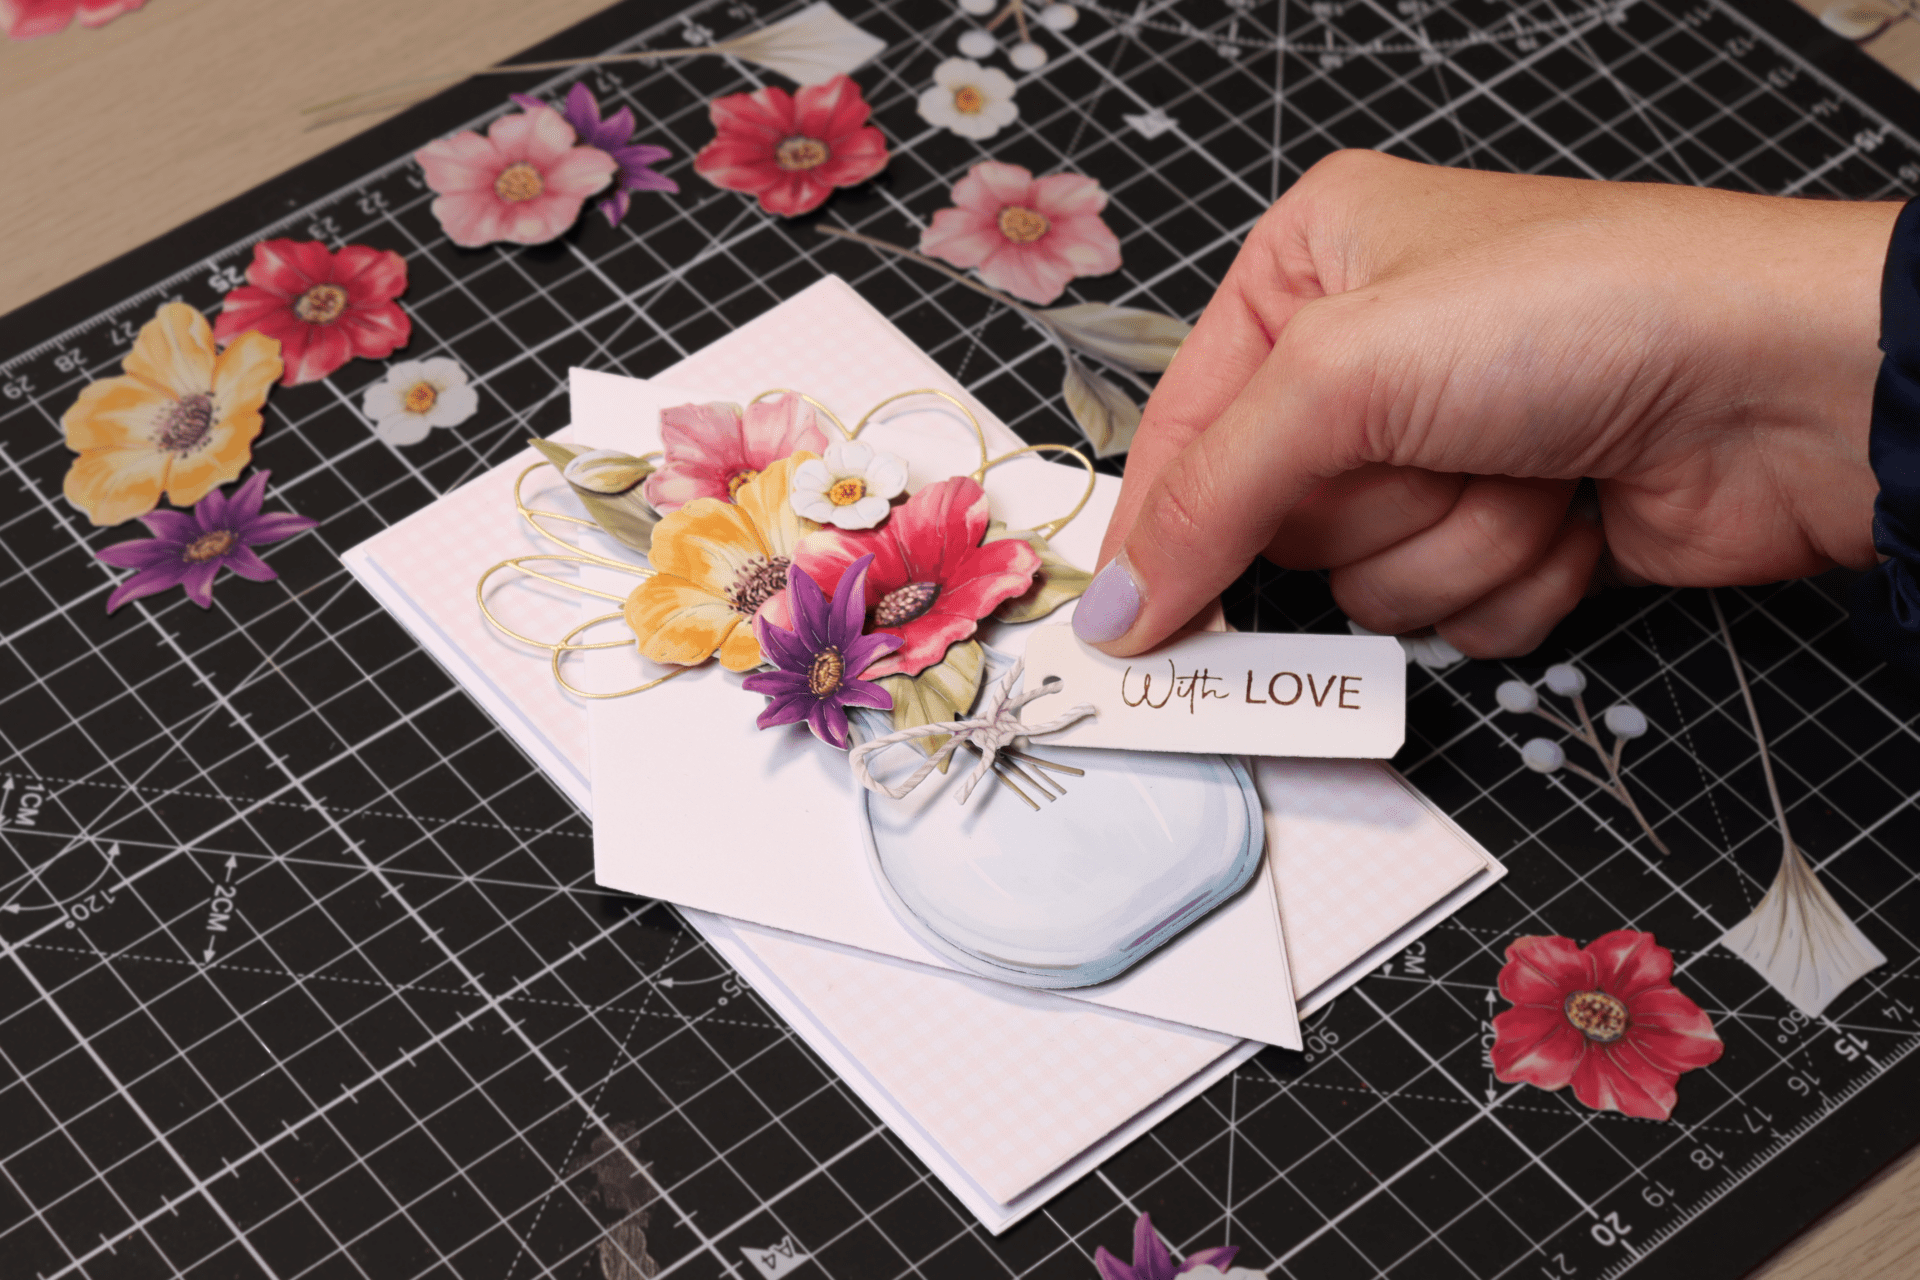
Sentiments are the words used in your design, and this is where you can entirely change the meaning and intention of your card. You might have a stamped sentiment, a die-cut sentiment, printed, label, along with many other kinds of sentiments.
They are normally placed last on a layered card, and they help to finish off and finalise the design, ready to give to your lucky recipient!
Shop our range of sentiment stamps here
Now that you understand a bit more about how to make layered cards, it’s time for you to start crafting your own beautiful cards!
Don’t forget to show us your beautiful Carnation Crafts makes on our Facebook group. Carnation Crafters is a vibrant and welcoming community for like-minded crafters who want to share their hard work and creativity, and is the perfect place for even more inspiration, tips, and tricks.


